2011
01.20

Extracting data from a CCTV DVR hard disk

3 people like this post.
Share

Today I was handed a hard disk, removed from from a CCTV DVR about which we knew nothing (no model/make). The request was to extract as much footage as possible from it. I hooked the disk to my laptop via a SATA/USB adaptor but, unsurprisingly, wasn’t able to find/mount a filesystem. I dumped the first 30 megabytes off the device (dd if=/dev/sdb of=x.bin bs=1M count=30) and opend the resulting file with a hex editor:

# od -t x1 -a x.bin | sed 's/nul/   /g' | head
0000000  44  48  46  53  34  2e  31  00  00  00  00  00  00  00  00  00
          D   H   F   S   4   .   1                                    
0000020  00  00  00  00  00  00  00  00  00  00  00  00  00  00  00  00
                                                                       
*
0036040  00  00  00  00  00  00  00  00  03  00  00  00  01  00  00  00
                                        etx             soh            
0036060  03  00  00  00  00  00  00  00  00  00  00  00  00  00  00  00
        etx                                                            
0036100  00  00  00  00  00  00  00  00  22  00  00  00  00  00  00  00

The first bytes read “DHFS4.1”. Various Google searches return just one english hit: a machine translated page from chinese mentioning a company named “Dahua” that manufactures some video surveillance equipment. On their support page an HDD Download Tool can be found (filename: HDD Download Tool.rar). It can look up video clips stored on a disk by date, time and channel (input number), and extract them as “.dav” files (e.g: 01.23.03-01.33.21[M][@2a2ed][0].dav). You can convert .dav files to .avi using “dhavi.exe” (from bahamassecurity.com). I was able to run the latter with Wine, which probably means that .dav content can be packed into an .avi container without transcoding (even though the website says something about H.264 codecs). The former tool, instead, requires Windows because of the raw disk I/O going on.

Hopefully, this post gathered some difficult to find info, coming either from Chinese pages or sites not indexed by Google…

Size    | md5sum                           | Filename
--------+----------------------------------+------------------------
240168  | cbe0912a78074226060d4101f4f67902 | *HDD Download Tool.rar
87552   | 18b79f0827dfa27cf4e068f02d78f02b | *HDD Download Tool User's Manua 2009-6.doc
216081  | 993c1bd56e03427351bb8cdfea142803 | *General_DiskCopy_Eng_TS_V1.00.0.R.090611.rar
299008  | 624721057cd0857ef5ecbde9643debfd | *General_DiskCopy_Eng_TS_V1.00.0.R.090611.exe
208896  | e5e3fa834ccf7e6b1ad222b1aa38b91c | *DiskIOCtl.dll
1037312 | 4a5b234d673e5d10fbddddae3bb777a1 | *dhavi.exe
2011
01.12

Or how to use the dsquery/dsget/dsmod commands to copy all the members from an
Active Directory group (source), to another one (destination).

If, like me, you are on a neverending quest to click less and script more, you can solve the problem this way:

  • Create the destination group, should it not exist.
  • Find the source group’s DN:
    >dsquery group -samid sourcegroup
    "CN=sourcegroup,OU=Groups,DC=contoso,DC=com"

    -samid” argument is the group name whose DN you’re looking for. You can use “*” as a wildcard.

  • Ditto for the destination group:
    >dsquery group -samid destinationgroup
    "CN=destinationgroup,OU=Groups,DC=contoso,DC=com"</li>
  • On with the copy itself:
    >dsget group "CN=sourcegroup,OU=Groups,DC=contoso,DC=com" -members -expand | dsmod group "CN=destinationgroup,OU=Groups,DC=contoso,DC=com" -addmbr -c
    dsmod succeeded:CN=destinationgroup,OU=Groups,DC=contoso,DC=com

    These are two commands: “dsget group” and “dsmod group“. Output from the first is piped to the second. “-members” causes the group members’ DNs to be listed on standard output (one by line, quoted). “-expand” makes dsget to recursively expand the sub-groups that sourcegroup may hold.
    Conversely, dsmod modifies destinationgroup adding members to it.
    Very cool, so far. The only caveat is that the “-c” switch doesn’t work as advertised. It should copy members over destinationgroup even if already exist, but it doesn’t. If you need to re-sync source and dest, delete source’s contents from dest.

Bonus note; here’s a quick way to discover a user’s DN given his username:

>dsquery user -samid jdoe
"CN=John Doe,CN=Users,DC=contoso,DC=com"
2010
12.14

One of the most procrastinated issues I had at a Customer’s, was the proliferation of errors like these (as shown in servers/clients Event Viewer):

Event Type: Error
Event Source:   crypt32
Event Category: None
Event ID:   8
Description:
Failed auto update retrieval of third-party root list sequence number from: <http://www.download.windowsupdate.com/msdownload/update/v3/static/trustedr/en/authrootseq.txt> with error: This network connection does not exist.
Event Type: Error
Event Source:   crypt32
Event Category: None
Event ID:   11
Description:
Failed extract of third-party root list from auto update cab at: <http://www.download.windowsupdate.com/msdownload/update/v3/static/trustedr/en/authrootstl.cab> with error: A required certificate is not within its validity period when verifying against the current system clock or the timestamp in the signed file.

There are several posts mentioning the issue, this one pointed me in the right direction. Basically, because of how SEP components communicate, Windows is triggered into updating the list of trusted root Certification Authorities. It tries to do so through the Internet using the Computer account. The latter may not have any proxy configured. Being unable to reach outside, the host gets flooded by crypt32 errors.

In order to solve the issue, I decided to deploy a valid proxy configuration, for the Computer account (SYSTEM user), on a subset of the Domain’s hosts.
One of the ways to script that is the “proxycfg -u” command1 that works by copying the current user proxy settings to the SYSTEM’s registry. Sounds cool but if the current user is not a member of the local Administrators group, he won’t have the necessary rights. The following script instead, can be launched via Group Policy2 during operating system startup, and since it’s a startup script rather than a login one, it will run with administrative privileges.

Nothing fancy in the below source. It creates the registry key if it doesn’t exist, then sets the right value for WinHttpSettings which I obtained this way:

  • use “proxycfg -u” on a test host
  • use the Registry editor to export the contents of HKEY_LOCAL_MACHINE\SOFTWARE\Microsoft\Windows\CurrentVersion\Internet Settings\Connections

The value is of type REG_BINARY. Since the RegWrite API (method of class WScript.Shell) cannot deal with binary values, WMI (StdRegProv registry provider) needs to be used. Also, SetBinaryValue expects an array of decimal values, while Regedit exports them as hexadecimal digits (you’ll have to take care of the conversion yourself).

On Error Resume Next
Const HKEY_LOCAL_MACHINE = &H80000002

strPath = "SOFTWARE\Microsoft\Windows\CurrentVersion\Internet Settings\Connections"
strKey = "WinHttpSettings"
strValue = "24,0,0,0,0,0,0,0,3,0,0,0,19,0,0,0,112,114,111,120,121,46,99,117,115,116,46,108,97,110,58,56,48,56,48,47,0,0,0,49,48,46,42,46,42,46,42,59,115,101,114,118,101,114,50,48,59,115,101,114,118,101,114,50,48,46,42,59,42,46,99,117,115,116,46,108,97,110,59,60,108,111,99,97,108,62"
strMachineName = "."

arrValues = Split(strValue,",")
strMoniker = "winMgmts:\" & strMachineName & "\root\default:StdRegProv"
Set oReg = GetObject(strMoniker)
rv = oReg.CreateKey(HKEY_LOCAL_MACHINE, strPath)
rv = oReg.SetBinaryValue(HKEY_LOCAL_MACHINE, strPath, strKey, arrValues)

If the scripts works as it should, you’ll be greeted by these events:

Event Type: Information
Event Source:   crypt32
Event Category: None
Event ID:   7
Description:
Successful auto update retrieval of third-party root list sequence number from: <http://www.download.windowsupdate.com/msdownload/update/v3/static/trustedr/en/authrootseq.txt>
Event Type: Information
Event Source:   crypt32
Event Category: None
Event ID:   2
Description:
Successful auto update retrieval of third-party root list cab from: <http://www.download.windowsupdate.com/msdownload/update/v3/static/trustedr/en/authrootstl.cab>

And, hopefully, crypt32 errors will be gone for good.

  1. See Using the WinHTTP Proxy Configuration Utility
  2. Computer Configuration, Windows Settings, Scripts, Startup
2010
09.08

Oracle Reports Server font issues

2 people like this post.
Share

Here’s a couple of hints you may find useful when shooting troubles around Oracle Reports Server.
It all starts when Customer wants to produce PDF reports using a custom font. Of course the font won’t be there when the file is opened on a client PC. The report server must either embed (include entirely) or subset (include just the actually used glyphs) the font into the PDF.

We’re running Oracle Application Server 10g Release 2 on Windows.

More than one Reports Server (RS from now on) can be run at the same time. Each RS is identified by name. Open a DOS window, change directory to the one where reports templates/resources are, then launch:

rwserver server=rstest

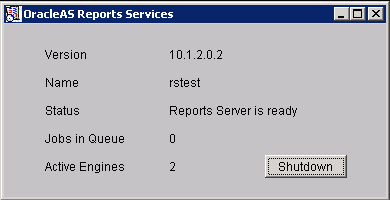
Test Oracle Reports Server is running

RS named “rstest” will get its own log directory and configuration file, under the Application Server “HOME”:

reports\conf\rstest.conf
reports\logs\rstest\
reports\logs\rstest\rwserver.log

Quite convenient: you’ll leave the production RS alone, be able to activate debug tracing, restart at will, …

Here’s how tu run a test report on the “rstest” RS:

rwclient SERVER=rstest REPORT=d01_skt_anag1.rdf userid=user/pwd@db DESFORMAT=pdf DESTYPE=file DESNAME=c:\temp\testoutput.pdf

Back to our issues. First step, I’d say, is to find out the exact name of the font we’d like to embed. Did you know you can convert Report Developer “source” files (.rdf) to XML, then peek in them? Use:

rwconverer STYPE=rdffile SOURCE=d01_skt_anag1.rdf DTYPE=xmlfile dest=c:\temp\rpt.xml

“Cooper Black” is the name:

C:\dev\appl\Reports>findstr /I face c:\temp\rpt.xml | findstr /I coop
            <font face="Cooper Black" size="14" bold="yes" textColor="red"/>
              <font face="Cooper Black" size="11" bold="yes" textColor="red"/>
            <font face="Cooper Black" size="12" bold="yes" textColor="red"/>

Install the font in Windows. Oddly, things didn’t seem to work for me when I just copied the .ttf file in the C:\WINDOWS\Fonts directory. I had to use the “Install New Font” menu item. I thought both methods were equivalent, maybe I was wrong, maybe I’m talking junk now.

TTF font install in Windows

Modify the uifont.ali file (tools\common), telling the Report Server to subset “Cooper Black” into the generated PDF files. Just add a line under the PDF:Subset section, equating the font name to the TTF file name, both enclosed in double quotes.

[ PDF:Subset ]
"Cooper Black" = "COOPBL.TTF"

The fnchk.exe program (ran without arguments) displays the full path of uifont.ali and tells if everything is fine or the file contains any syntax error.

Installing the font in Windows is not enough, you should also put it in one of the REPORTS_PATH directories. The value of this variable can be found in the registry, I chose: C:\Oracle\Products\FRHome\reports\templates. FileMon is essential when trying to see which files can’t be found by a process.

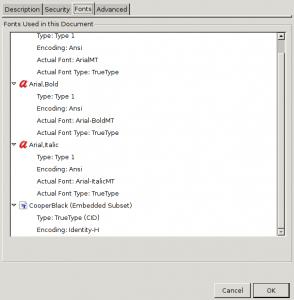
Time to restart the Reports Service, generate a PDF report and check if fonts are good (in Acrobat Reader: CTRL-D, “Fonts” tab). Ours is listed as “Embedded Subset”; we’re done.

Embedded Subset Font in PDF

See also: Oracle Support Note.350971.1 “Troubleshooting Guide for Font Aliasing / Font Subsetting / Font Embedding Issues”.

2010
09.06

Or: “How to call a web server from a Microsoft SQL Server Stored Procedure”.
Customer has got a VoIP software PBX (Swyx). It logs incoming calls (the CDR) in a MS SQL Server database. The CDR structure is straightforward: a single table where each row is a call, indexed by CallId (transferred calls get, eventually, a new row and a “child CallId”).
I needed to process the CDR within these specs/restrictions:

  • Each row has to be processed as soon as it is INSERTed
  • Rows must be filtered (depending on the called number)
  • Filtered rows must be “mirrored” to a MySQL DB
  • MS SQL machine is heavily loaded and mission critical; the row-copy mechanism must be light and fast

The first and second specs imply the use of triggers/stored procedures.

I originally thought that the “DB link”-kind of functionality could be achieved natively on MS SQL. In theory it can, via Linked Servers (bound to ODBC Data Sources). There’s a catch though: you can SELECT stuff on linked servers at will, but as soon as you try to INSERT, you’ll hit error 73911. MS SQL, can’t really blame it, would like to be able to rollback any change made, even on the linked MySQL. It needs to start a (implicit, distributed) transaction on MySQL, but that’s not supported and the write fails. This workaround (forcibly switch off implicit transactions) didn’t work for me. Apparently, the Oracle OLEDB Provider is able to ignore/disable distributing transactions when the parameter DistribTX=0 is in the provider string. MySQL’s ODBC driver doesn’t provide a similar toggle.

The easiest way to push data “out” of MS SQL is (arguably) through HTTP. The DB GETs a full URL, passing key/value parameters to a Web Service that outputs to MySQL.

On with the code, starting with the “Web Service”. What follow is a mere Perl script, useful for testing. Depending on the expected load, you may want to use a proper application server, providing MySQL DB connection pooling. What you should really do, is serve the script through HTTPS and password protect it. Without SSL, a malicious user could sniff the cleartext requests sent by the source DB, forge similar ones and litter/DOS the MySQL instance. Of course, the Web Service could output to just any supported DB, not only to MySQL.

#!/usr/bin/perl

use DBI;
use CGI;
use strict;

my $DEBUG = 0;
my @FIELDS = qw(
CallId
OriginationNumber
CalledNumber
DestinationNumber
StartTime
ScriptConnectTime
DeliveredTime
ConnectTime
TransferTime
EndTime
DisconnectReason
TransferredToCallId
);

my $q = new CGI;
print $q->header(-type => 'text/plain', -charset => 'ISO-8859-1', -expires => '-1d');

# checks
my $checkresult = 1;
my $checkmessage = '';
sub setcheck ($$$$) {
    my ($rrc, $rc, $rrs, $rs) = @_;
    $$rrc = $rc;
    $$rrs = $rs;   
}
sub isnumber { return 1 if $_[0] =~ /^[0-9]*$/i; return 0; }
sub issane { return 1 if $_[0] =~ /^[a-z0-9%:\- ]*$/i; return 0; }
setcheck(\$checkresult,0,\$checkmessage,'NULL CallId') if $checkresult and not $q->param('CallId');
setcheck(\$checkresult,0,\$checkmessage,'CallId must be a number') if $checkresult and not isnumber($q->param('CallId'));
foreach (@FIELDS) {
    setcheck(\$checkresult,0,\$checkmessage,"$_ value contains invalid characters")
        if $checkresult and not issane($q->param($_));
}

if ($checkresult) {
    my $dbh = DBI->connect('DBI:mysql:database=dbname','dbuser','password') or ((print "KO: Error $DBI::err - $DBI::errstr\n"), exit);
    my $values = join ',', ( map { $dbh->quote( $q->param($_) ? $q->param($_) : '') } @FIELDS );
    my $sth = $dbh->prepare("INSERT INTO callslog VALUES ($values)") or ((print "KO: Error $DBI::err - $DBI::errstr\n"), exit);
    $sth->execute or ((print "KO: Error $DBI::err - $DBI::errstr\n"), exit);
    if ($DEBUG) {
        print $_.': '.$q->param($_)."\n" for @FIELDS;
    }
    print "OK\n";
} else {
    print "KO: $checkmessage\n";
}

exit;

Next, the trigger code. It acts after each INSERT on the IpPbxCDR table. If a called number ends with the given digits, calls the Stored Procedure spLogCall, passing it the fields we’re interested in. I use the (commented) raiserror call for debugging purposes.

USE [ippbxlog]
GO
SET ANSI_NULLS ON
GO
SET QUOTED_IDENTIFIER ON
GO
CREATE TRIGGER [dbo].[tr_ProcessCall]
ON [dbo].[IpPbxCDR]
AFTER INSERT
AS
BEGIN
    DECLARE
        @RightMatch nvarchar (10),
        @CallId INT,
        @OriginationNumber nvarchar(50),
        @CalledNumber nvarchar(50),
        @DestinationNumber nvarchar(50),
        @StartTime datetime,
        @ScriptConnectTime datetime,
        @DeliveredTime datetime,
        @ConnectTime datetime,
        @TransferTime datetime,
        @EndTime datetime,
        @DisconnectReason nvarchar(50),
        @TransferredToCallId INT
    SET @RightMatch = '12345678'
    SELECT
        @CallId = CallId,
        @OriginationNumber = OriginationNumber,
        @CalledNumber = CalledNumber,
        @DestinationNumber = DestinationNumber,
        @StartTime = StartTime,
        @ScriptConnectTime = ScriptConnectTime,
        @DeliveredTime = DeliveredTime,
        @ConnectTime = ConnectTime,
        @TransferTime = TransferTime,
        @EndTime = EndTime,
        @DisconnectReason = DisconnectReason,
        @TransferredToCallId = TransferredToCallId
    FROM INSERTED
    IF (RIGHT(@DestinationNumber,LEN(@RightMatch)) = @RightMatch) OR (RIGHT(@CalledNumber,LEN(@RightMatch)) = @RightMatch)
    BEGIN
--raiserror('%s',16,1, @DestinationNumber)
        EXEC spLogCall
            @CallId,
            @OriginationNumber,
            @CalledNumber,
            @DestinationNumber,
            @StartTime,
            @ScriptConnectTime,
            @DeliveredTime,
            @ConnectTime,
            @TransferTime,
            @EndTime,
            @DisconnectReason,
            @TransferredToCallId
    END
END

Lastly, the Web Service contacting Stored Procedure. I use sp_OACreate to create an OLE object of class MSXML2.ServerXMLHTTP passing it the contructed GET URL (address + parameters). Depending on MS SQL’s version, you may have to explicitly enable in-database OLE automation, this way:

exec sp_configure 'show advanced options', 1
go
reconfigure
go
exec sp_configure 'Ole Automation Procedures', 1
go
reconfigure
go

Timeouts for various operations are set to reasonably low values, we don’t want the DB to “block” for too long. And again: use HTTPS. Get your certificates right (on MS SQL’s server, install the root certificate for the CA who issued the cert you’re using on the web/application server) and use HTTPS.

USE [ippbxlog]
GO
SET ANSI_NULLS ON
GO
SET QUOTED_IDENTIFIER ON
GO

CREATE PROCEDURE [dbo].[spLogCall]
    @CallId INT,
    @OriginationNumber nvarchar(50),
    @CalledNumber nvarchar(50),
    @DestinationNumber nvarchar(50),
    @StartTime datetime,
    @ScriptConnectTime datetime,
    @DeliveredTime datetime,
    @ConnectTime datetime,
    @TransferTime datetime,
    @EndTime datetime,
    @DisconnectReason nvarchar(50),
    @TransferredToCallId INT
AS

BEGIN
DECLARE
    @Object INT,
    @hr INT,
    @openparams nvarchar(2048),
    @responsetext VARCHAR(8000);

EXEC @hr = sp_OACreate 'MSXML2.ServerXMLHTTP', @Object OUT
IF @hr = 0
BEGIN
    SET CONCAT_NULL_YIELDS_NULL OFF
    SET @openparams = 'open("GET", "http://10.1.1.123/ws/CDR.pl?' +
        'CallId=' +               CAST(@CallId AS VARCHAR) + '&' +
        'OriginationNumber=' +    CAST(@OriginationNumber AS VARCHAR) + '&' +
        'CalledNumber=' +         CAST(@CalledNumber AS VARCHAR) + '&' +
        'DestinationNumber=' +    CAST(@DestinationNumber AS VARCHAR) + '&' +
        'StartTime=' +            CONVERT(VARCHAR, @StartTime, 120) + '&' +
        'ScriptConnectTime=' +    CONVERT(VARCHAR, @ScriptConnectTime, 120) + '&' +
        'DeliveredTime=' +        CONVERT(VARCHAR, @DeliveredTime, 120) + '&' +
        'ConnectTime=' +          CONVERT(VARCHAR, @ConnectTime, 120) + '&' +
        'TransferTime=' +         CONVERT(VARCHAR, @TransferTime, 120) + '&' +
        'EndTime=' +              CONVERT(VARCHAR, @EndTime, 120) + '&' +
        'DisconnectReason=' +     CAST(@DisconnectReason AS VARCHAR) + '&' +
        'TransferredToCallId=' +  CAST(@TransferredToCallId AS VARCHAR) +
        '", False)'
    EXEC @hr = sp_OAMethod @Object, 'setTimeouts(3000,3000,3000,3000)'
    EXEC @hr = sp_OAMethod @Object, @openparams
    EXEC @hr = sp_OAMethod @Object, 'Send'
    EXEC @hr = sp_OAGetProperty @Object, 'responseText', @responseText OUT
END
END

That’s it, the method performs and scales quite well. I think I’ll find other uses for it soon…

  1. The operation could not be performed because OLE DB provider “%ls” for linked server “%ls” was unable to begin a distributed transaction.
2010
08.25

Recovering NTBackup Tapes

5 people like this post.
Share

This article will show you how to handle tape backups generated by NTBackup, turn them into a .BKF file (using Linux) and extract specific files (using Linux/Windows). Some of the stuff explained here may also be useful when dealing with corrupt tapes/files, and may work for any backup software that generates MTF (Microsoft Tape Format) output, such as maybe Symantec Backup Exec1.

The scenario: an old machine (hosting a not so important app) crashes badly due to multiple disk failures. O.S. (Windows 2000 Server) won’t boot anymore. Backups were directed to a local DDS tape drive, the only one of its kind surviving in the whole Company. While reinstalling the app to another server, I need to recover some files and have access to the pre-crash registry.

And here’s the plan:

  • Boot the half-dead server with the invaluable SystemRescueCd.
  • Put the last available tape backup in the drive.
  • Save an image of the tape somewhere.
  • Extract stuff from the image.

When SystemRescueCd is running and network connected, make available a shared folder:

root@sysresccd /root % mkdir /mnt/storagespace
root@sysresccd /root % mount -t cifs //fileserver/e$ /mnt/storagespace -o username=administrator,workgroup=domain.local

Then, generate the image. NTBackup tape backups are spread across multiple “tape files”. If you read the tape from the beginning, sooner or later you will hit EOF (an end-of-file condition). Don’t rewind it: go on to the next file instead. Repeat until there are no more files to read.
On Unix, the first SCSI tape device is mapped to /dev/st0 and /dev/nst0. When a process finishes reading from /dev/st0, the tape is implicitly rewound. Viceversa, using /dev/nst0 doesn’t cause any rewind; tape will stay positioned right after the last block read.

Just in case, perform a manual rewind:

root@sysresccd /mnt/storagespace/temp % mt -f /dev/st0 rewind

Then, try to guess the right block size. It seems to be set at 16K. Should this method fail, check the “How do I find out tape block size?” method here.

root@sysresccd /mnt/storagespace/temp % mt -f /dev/st0 status
SCSI 2 tape drive:                          
File number=0, block number=0, partition=0.
Tape block size 16384 bytes. Density code 0x26 (DDS-4 or QIC-4GB).
Soft error count since last status=0
General status bits on (41010000):
 BOT ONLINE IM_REP_EN

Start reading (by means of dd) with the specified block size. See? We’re using the non-rewinding tape device /dev/nst0.

root@sysresccd /mnt/storagespace/temp % for f in `seq 1 10`; do echo dd if=/dev/nst0 of=tapeblock`printf "%
06g" $f`.bin ibs=16384; done
dd if=/dev/nst0 of=tapeblock000001.bin ibs=16384
dd if=/dev/nst0 of=tapeblock000002.bin ibs=16384
dd if=/dev/nst0 of=tapeblock000003.bin ibs=16384
dd if=/dev/nst0 of=tapeblock000004.bin ibs=16384
dd if=/dev/nst0 of=tapeblock000005.bin ibs=16384
dd if=/dev/nst0 of=tapeblock000006.bin ibs=16384
dd if=/dev/nst0 of=tapeblock000007.bin ibs=16384
dd if=/dev/nst0 of=tapeblock000008.bin ibs=16384
dd if=/dev/nst0 of=tapeblock000009.bin ibs=16384
dd if=/dev/nst0 of=tapeblock000010.bin ibs=16384
root@sysresccd /mnt/storagespace/temp % dd if=/dev/nst0 of=tapeblock000001.bin ibs=16384
1+0 records in
32+0 records out
16384 bytes (16 kB) copied, 0.0341089 s, 480 kB/s
root@sysresccd /mnt/storagespace/temp % dd if=/dev/nst0 of=tapeblock000002.bin ibs=16384
270540+0 records in
8657280+0 records out
4432527360 bytes (4.4 GB) copied, 7666.22 s, 578 kB/s
[..]
root@sysresccd /mnt/storagespace/temp % dd if=/dev/nst0 of=tapeblock000007.bin ibs=16384
4+0 records in
128+0 records out
65536 bytes (66 kB) copied, 0.1176 s, 557 kB/s
root@sysresccd /mnt/storagespace/temp % dd if=/dev/nst0 of=tapeblock000008.bin ibs=16384
0+0 records in
0+0 records out
0 bytes (0 B) copied, 0.00461986 s, 0.0 kB/s
root@sysresccd /mnt/storagespace/temp % dd if=/dev/nst0 of=tapeblock000009.bin ibs=16384
dd: reading `/dev/nst0': Input/output error
0+0 records in
0+0 records out
0 bytes (0 B) copied, 0.00356835 s, 0.0 kB/s

Reads beyond the last file will result in an “Input/output error”.

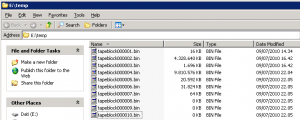
Tape image chunks

It’s time to join the .bin files into a single one: the tape image (maybe using HJSplit for the task). You could’ve been more clever than me and appended dd‘s output to a single file, thus skipping the join step and saving space. I didn’t do it because I wanted to see if any tape file was corrupted (and be able to re-read it, if needed).

I called the tape image “backup.bkf”, even though it’s not a true .BKF file… As we said, it’s a tape image. NTBackup is not able to read it, whereas the abundance of “BKF recovery” software can. Before going on, let me polemicize a bit. There are many, almost identical, software of this kind. I’ve got the feeling that they all “borrow” from this open source BKF reader2. Looks like different commercial developers grabbed the same source, embellished the GUI just a bit, and made a product to sell. How lame. But it turns out that you don’t need to pay a cent to extract files from a .BKF or tape image, on Linux or Windows as well.

On windows, get ntbkup by William T. Kranz . I use the (optional) -s3 switch to target set 3 which I know holds the System State.

C:\temp\x>..\ntbkup.exe ..\backup.bkf -s3 -l"\Registry:"

NTBKUP Ver 1.07c compiled for WIN32 with MAX_PATH = 100
   compiled for 64 bit file offsets
Copyright (C) 2003 William T. Kranz
NTBKUP comes with ABSOLUTELY NO WARRANTY
Free software distributed under the terms of the GNU General Public license
See http://www.gnu.org/licenses/gpl.html for license information
Check http://www.fpns.net/willy/msbackup.htm for Updates & Documentation

resrict operations to backup set 3
device name: C:
volume name: Local disk
device name: D:
volume name: Volume
Set 3:
Name: Company lun-29-06-2009-23.04
Description:
User: DOMAIN\administrator

device name: System state data from 0x36113d956 to 0x3611ec956
length 716800  atrib 0x20  05/14/2008  03:10:38 PM
extracing: default:
 data from 0x3611ecd4e to 0x3611f2d4e
length  24576  atrib 0x20  06/29/2009  09:42:50 PM
extracing: SAM:
 data from 0x3611f3156 to 0x3611fe156
length  45056  atrib 0x20  06/29/2009  11:00:07 PM
extracing: SECURITY:
 data from 0x3611fe556 to 0x3621cb556
length 16568320  atrib 0x20  06/30/2009  01:35:59 AM
extracing: software:
 data from 0x3621cb952 to 0x362487952
length 2867200  atrib 0x20  06/29/2009  10:42:23 PM
extracing: system:
 data from 0x362487d2e to 0x3624aad2e
length 143360  atrib 0x20  06/04/2003  01:24:14 PM
extracing: userdiff:

Bingo, I can load the software hive with “reg load” (see here) and extract the keys I need.

Should you prefer so, download mtftar on your Linux box, compile it and run something like:

./mtftar -f /mnt/storagespace/temp/backup.bkf | tar xvf - "Registry"

Extract the other files you need and voilà…

  1. ex Veritas Backup Exec
  2. There’s no executable in the archive. You need Visual Studio and compile it for yourself.
2010
07.03

A newly installed FortiGate cluster (a simple two node HA active-passive setup) and some packet loss issues…
Ping from the LAN side to the Internet (or from the firewall itself) resulted in about 20% packet loss, while the other way around (WAN to firewall’s main public IP) didn’t work at all.

I used the following command to check my MAC addresses:

FORTIGATE-PRI # diagnose hardware deviceinfo nic wan1
[..]
Current_HWaddr                  00:09:0f:09:00:08
Permanent_HWaddr                00:09:0f:d1:be:ef
[..]

Then resorted to the “show mac” switches facilites (some Cisco, some ProCurve) to know on which network ports that particular MAC lied… Only to discover that the cluster’s “logical” MAC address (00:09:0f:09:00:08) wasn’t really located where I expected it to be.
Well, FortiGate’s MAC addresses aren’t randomly generated. They have predictable values that depend on the firewall’s port number. The eight port (or wan1, in my case) will always have a virtual MAC as the one above. What will happen if you have two clusters (as we had) sitting on the same L2 network segment (on the same broadcast domain, that is)? You said MAC address conflict? You’re right.
The solution is simple, use the group-id directive to tweak the logical MAC address, i.e.:

config system ha
    set group-id 10
end

Changes the second right-most bytes of the MAC, from 00 to 0a:

before  00:09:0f:09:00:08
after   00:09:0f:09:0a:08

Point is that the “FortiOS High Availablity Handbook” explains the case very thoroughly! See page 192, paragraph “Diagnosing packet loss with two FortiGate HA clusters in the same broadcast domain”. We’re so used to discardable product documentation that sometimes we don’t even try to look for clues where they should normally reside.
Instead of troubleshooting, this time, I should really have Read The (unexpectedly) Fine Manual…

2010
06.14

Unknown devices on HP servers

1 person likes this post.
Share

Following up on the “Unknown devices on IBM servers” post, let me talk about a similar situation with HP machines (DL180 G6, in my case).

The device that Windows fails to identify is this one:

PCI\VEN_8086&DEV_3A22&CC_0106

More info can be found by looking up the IDs in the pci.ids file (as I often do), or by means of the various “Unkown Device Identifier” type of software (e.g. this one). If you have a Linux machine at hand, such a one-liner may suit you:

# sed -n -e '/^8086/,/3a22/p' /usr/share/misc/pci.ids | sed -n -e '1p;$p'
8086  Intel Corporation
        3a22  82801JI (ICH10 Family) SATA AHCI Controller

What’s missing is an Intel SATA driver; needless to say that you won’t find it anywere on HP site.
I downloaded and installed the Rapid Storage Technology Driver from Intel’s web site (here). A 280KB download named “STOR_all32_f6flpy_9.6.0.1014_PV.zip” fixed things up for me.
Maybe the proper thing to try would’ve been the latest (March 2010) Proliant Support Pack, but it’s a big download and I didn’t have the time. Also, the onboard SATA controller isn’t really used (the additional SAS RAID is, instead) and I just wanted to get rid of the yellow warning sign in Device Manager.

2010
05.28

The offline ACU CD

2 people like this post.
Share

Well hidden in their labyrinthian web site, you may stumble upon HP’s “Array Configuration Utility (ACU) Offline CD for Smart Array”. A plain bootable CD, useful when ACU simply can’t be installed on the server/OS.
Example: I needed to tweak SSP (Selective Storage Presentation) settings on an MSA1000, connected through Fiber Channel HBAs (QLogic) to some rather old HP DL580 G2. The servers were running VMware ESX 3i 3.5.0 build-207095 (the latest one compatibile with those kind of CPUs) with no management agents installed. Since the MSA1000 can only be managed “in-band” or via a non standard serial cable the Customer, of course, lost long ago, I rebooted an ESX host with the offline ACU CD…
Before that, I also tried a standard SmartStart CD, but it didn’t work. I had version 7.80 (way younger than the servers/HBAs), but no link lights on the FC switch, meaning no firmware loaded on the QLogic card, meaning no SmartStart supported HBA drivers. Offline ACU CD version 8.20.19 worked like a charm instead. Find its latest release by searching “array configuration utility” on hp.com, clicking on “Download software”, then “Linux GUI ACU”. Download link is somewhere in that page…

2010
05.24

(This, for once, is going to be quick.)
Did you know about the Dnscmd.exe command? Read about it here and here. It’s the command-line/DOS prompt way to configure Microsoft’s DNS servers… If you need to create many zones/records at once, it saves you lots of clicks.
Here’s how to add six DNS zones (same domain name, different TLD). With the /DSPrimary option, the zone will be stored into Active Directory (rather than a file).

dnscmd /ZoneAdd domainname.bz  /DSPrimary
dnscmd /ZoneAdd domainname.biz /DSPrimary
dnscmd /ZoneAdd domainname.com /DSPrimary
dnscmd /ZoneAdd domainname.eu  /DSPrimary
dnscmd /ZoneAdd domainname.net /DSPrimary
dnscmd /ZoneAdd domainname.org /DSPrimary

And here’s how to add the same “A” record (named “www”) to each of the zones created above.

dnscmd dns-dc-hostname /RecordAdd domainname.bz  www A 10.0.0.123
dnscmd dns-dc-hostname /RecordAdd domainname.biz www A 10.0.0.123
dnscmd dns-dc-hostname /RecordAdd domainname.com www A 10.0.0.123
dnscmd dns-dc-hostname /RecordAdd domainname.eu  www A 10.0.0.123
dnscmd dns-dc-hostname /RecordAdd domainname.net www A 10.0.0.123
dnscmd dns-dc-hostname /RecordAdd domainname.org www A 10.0.0.123

As you may have guessed this is the typical scenario where you’ve got to re-create some external zones, on the internal DNS servers. That’s needed in order for the internal hosts to reach some server with the “public” DNS name, but the private IP.
For the sake of completeness, let me also mention that you could achieve the same effect by leaving DNS as it is, and configuring “loopback NAT”/”double NAT” on the router/firewall. E.g.: an internal Host wants to reach an internal Server, given it’s public hostname, mapped to a public IP address. It asks the (possibly internal) DNS to translate the name. DNS doesn’t know the zone, it forwards the query to an external DNS Server, obtaining a public IP address that it hands back to the Client. Since its address is non-local, while trying to talk with the Server, the Client sends packets to its default gateway (possibly the router/firewall). The firewall matches the server’s public IP addresses, substituting it with the right private one. It also changes the source IP, swapping the Client’s with the firewall’s LAN address. This way Client and Server are actually communicating through the firewall, even if they’re both internal hosts. And the Server can’t tell Client A from Client B since every connection to it comes from the firewall’s IP address. That’s the main reason why I prefer duplicating the public DNS zones on internal DNS servers, with private IP addresses: you avoid routing internal traffic through the firewall, and avoid NAT where there shouldn’t be any.